Tutorial
Last edited: 2021-08-04
This page helps you get started with the Learning by Doing competition. It explains:
- How to download and understand competition data?
- How to make a valid submission?
The two tracks CHEM and ROBO are separate and you may submit entries in both tracks or in just one.
The white paper provides additional motivation and background information on the data generating processes.
Track CHEM
The following describes the data used for Track CHEM. A quick example of how
to read in the submission template and generate a submission is given
in the Jupyter notebook example_participant.ipynb which is
available in the starter kit on CodaLab.
Download
The training data and starter kit can be downloaded from the CodaLab competition site after registering for the competition. There are two files for each, the Trial and Validation Phase.
Data structure
The traing data zip file contains
system_i_instance_j.csv, for i = 01,02,…,11,12 and j = 00,01,…,19
The training data for this track are contained in the
system_i_instance_j.csv’s. There are data from 12 different
data-generating systems (indexed by i) and for each system there are
20 data files (indexed by j). This means that data in files that have
the same value of i were generated using the same (noisy) ODE system,
though under different initial conditions and control impulses. The
white paper contains more information
on the data-generating processes.
Each system_i_instance_j.csv has the following structure (x denotes
that the field holds a value):
ID |
System |
t |
Y |
target |
X1 |
X2 |
… | X14 |
U1 |
U2 |
… | U8 |
|---|---|---|---|---|---|---|---|---|---|---|---|---|
| x | x | x | x | x | x | … | x | x | x | … | x | |
| x | x | x | x | x | x | … | x | x | x | … | x | |
| x | x | x | x | x | x | … | x | x | x | … | x | |
| x | x | x | x | x | x | … | x | … | ||||
| x | x | x | x | x | x | … | x | … |
Above only the first five rows of data are shown – each file contains
20 rows in total (not counting the header with the column names). The
ID variable is only for internal use and can be ignored by
participants. The System variable states which system (i =
00,01,…,11,12) generated the observation. The target variable is
omitted in the training data. Each line contains an
observation of the 15-dimensional system (X1, X2, …, X14, Y)
at a time point (t). Y is the response variable that participants
aim to control when submitting their own control impulses and the
other predictor variables are named X1, X2,…, X14. The
variables U1, …, U8 contain the control impulses that were
applied to the system in the first part of the observation interval. For this reason, they
only have values in the first three rows. Note that the control impulses (U1, U2, …, U8) are always constant
over the interval during which they are applied, hence, the first three
rows contain the same control vector (U1, U2, …, U8).
Submission
The starter kit zip file contains the submission template
submission_template.csv.
Its structure is similar to that of the training data files:
ID |
System |
t |
Y |
target |
X1 |
X2 |
… | X14 |
U1 |
U2 |
… | U8 |
|---|---|---|---|---|---|---|---|---|---|---|---|---|
| x | x | 0 | x | x | x | x | … | x | … | |||
| x | x | 0 | x | x | x | x | … | x | … | |||
| x | x | 0 | x | x | x | x | … | x | … |
It contains 600 rows of data (not counting the header with the column
names), that is, 50 rows for each system. Each row contains a set of initial conditions (values of
Y,X1,X2,…,X14 at time t=0) and a target specifying the
desired value that Y should reach. The columns U1,U2,…,U8
are empty and should be filled in with impulse controls that
steer the response Y towards the target.
When preparing a submission, you should simply fill in the values of
U1,U2,…,U8 for each row of submission_template.csv. You then
submit this csv-file by packing it into a zip file and submitting it
to CodaLab.
To avoid issues with your submission, we ask
you to not make any other alterations to the submission template.
Participants should only apply control input such that all variables
U1,U2,…,U8 are in the interval [-10,10]. If the submitted
input is such that Ui > 10 then Ui = 10 is applied to the system
as control input while the submitted value is used for computing the
loss. Similarly, if Ui < -10 is submitted, then Ui = -10 is used
as control input while the original value is used when computing the
loss.
Evaluation
For each set of initial conditions and submitted control input, the
corresponding system is run to generate the (noiseless) Y process.
The control input is applied over the same interval as in the training data.
The loss has two terms; one measuring the proximity of Y to the target
over the interval [40,80] and one describing the cost of control:
\(J^{\text{tot}} :=\frac{1}{600}\sum_{i=1}^{12}\sum_{k=1}^{50}\left(\frac{1}{20}\cdot \sqrt{\frac{||u^{i,k}||_2^2}{8}} + \sqrt{\frac{1}{40}\int_{40}^{80}(Z_d^{i, k}(t)-y^{*, i, k})^2 dt }\right),\)
where \((i, k)\) indexes the i-th system and the k-th repetition, \(u^{i,k}\) is the selected control, \(Z_d^{i,k}(t)\) is the noiseless response process and \(y^{*,i, k}\) is the target. More details are available in the white paper
The 12 data-generating systems are split into validation and test systems. The validation loss which is available on a public leaderboard during the competition is therefore based only on a subset of the 12 systems. This subset remains the same throughout the competition. The test loss determines the final ranking of submissions.
Baselines
The three baseline methods included on the leaderboard are the zero baseline, the starter kit baseline, and the random forest baseline.
Zero baseline
This baseline simply sets the control input to the zero vector for every system and initial condition.
Starter kit baseline
The starter kit baseline is provided in the Jupyter notebook example_participant.ipynb
which can be found in the starter kit.
Random forest baseline
This baseline pools the data, that is, ignores which system generated the data. It then
fits a random forest to predict how the target process behaves towards the end of the observation interval using the U-variables
as predictors. Using the fitted model, for each new initial condition a control input
is chosen by optimizing an approximation of the loss function.
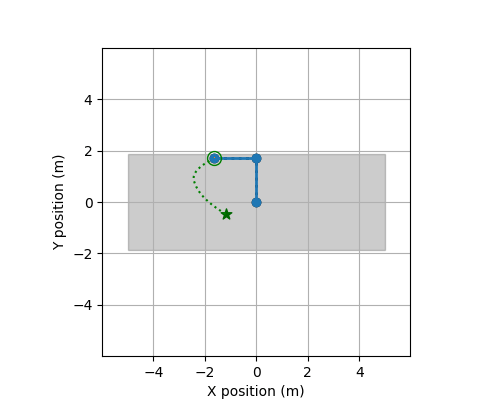
Track ROBO
 |
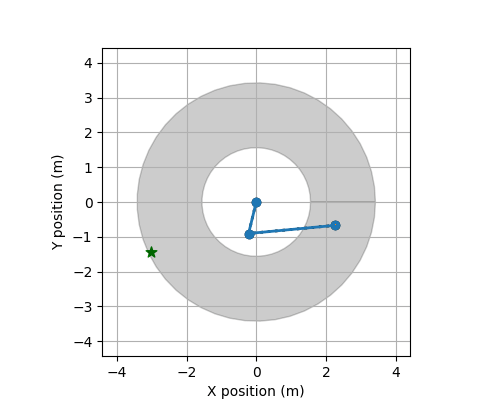 |
The following describes the data used for Track ROBO.
Download
The training data and starter kit can be downloaded from the CodaLab competition site after registering for the competition. Initially, there are two files available during the Trial Phase. The Trial Phase systems and data are different from the systems used for the Validation, Selection, and Final Phase. For the Validation Phase, new training data and an updated starter kit are made available.
Data structure
The validation phase training data zip file contains
(system name)_i.csv, for i = 00,01,…,49, andsystems.
These files contain the training data for this track. There is a total of 24 systems (each with 50 CSV-files). Each csv file contains observations of a trajectory observed discretely and the applied controls. The controls are piecewise constant.
The white paper contains more information on the data-generating processes.
The systems file containes the 24 systems’ identifying names.
The names end in
beetle (rotational 2-link robot),
bumblebee (prismatic 2-link robot),
or
butterfly (rotational 3-link robot)
and the prefixes may codify some closeness / similarities between the different systems.
Each CSV-file has the following structure (the number of variables and control variables varies between systems):
ID |
System |
t |
X |
Y |
X1 |
Y1 |
dX |
dY |
dX1 |
dY1 |
U1 |
U2 |
|---|---|---|---|---|---|---|---|---|---|---|---|---|
| x | x | x | x | x | x | … | x | x | x | … | x | |
| x | x | x | x | x | x | … | x | x | x | … | x | |
| x | x | x | x | x | x | … | x | x | x | … | x |
Above only the first three rows of data are shown – each file contains
201 rows in total (not counting the header with the column names). The
ID variable is only for internal use and can be ignored by
participants. The System variable states the name of the system that generated the observation.
Each line contains an
observation of the system (and its derivatives)
at a time point (t). Specifically, it contains variables, X, Y, Xi, Yi, dX, dY, dXi, dYi, Uj for i = 1,...,d
and j = 1,...,p where d and p depend on the system. The variables Ui contain the control impulses that were
applied to the system. Note that the applied control input is piecewise constant, see
the white paper for more information. The target trajectories
corresponding to the training data is not available to participants.
Submission
The starter kit contains an example submission that you can use to design your own submissions.
Importantly, the example_submission.zip contains a file controller.py.
The method get_input in this file computes the next control input at each time point t=0.00, 0.01, 0.02, ..., 1.99 based on the current state and position of the robot, and the target position for the next time point t + 0.01.
The implemented method is a placeholder that returns an input of correct shape.
Replace the method with your own controller
(and possibly instantiate system specific controllers/parameters in __init__
based on the system name),
pack metadata, start.sh, controller.py, wrapcontroller.py
into one zip file, and submit it
to CodaLab.
Details on Submission
Below we sketch the procedure of controller evaluation, which helps you to better interpret the logs and design your own controller environments to fit your needs. If any of the steps below fail, the submission will be marked as failed on codalab and the submission does not advance to the next step.
- When you submit your controller, we first check for the existence of the
metadata file and a start.sh file.
Any valid submission must contain those two files.
- The metadata file is used to specify the docker image within which you want your controller to run.
Per default this is
docker.io/learningbydoingdocker/codalab-competition-docker:latestwhich offers the following environment:- python:3.9.5-buster
- control==0.9.0
- cvxpy==1.1.13
- GPy==1.10.0
- matplotlib==3.3.4
- numpy==1.19.5
- onnxruntime==1.8.0
- pandas==1.2.1
- pyzmq==22.1.0
- scikit-learn==0.24.2
- skl2onnx==1.8.0
- scipy==1.6.0
- faiss-cpu==1.7.1.post2
- The start.sh file is called by our evaluation environment to boot up your controller.
- The metadata file is used to specify the docker image within which you want your controller to run.
Per default this is
- We (try to) pull the docker image specified in the metadata file.
- We run this image as an encapsulated container with resources limited to
24 GB RAM, 0 GB swap, 6 CPU cores (Intel Xeon Gold), and no network access;
we bind mount the content of your submission file to
/home/user/submission, set the working directory to/home/user/submission, and call/bin/bash start.shas user with ID 12345. - We wait up to 55 seconds for your controller container to be up and running and (try to) establish ipc socket communication with your controller.
- We iterate over all target trajectories and repeatedly send ipc socket requests to your controller to retrieve the next control input that should be applied to the system. These requests contain the robot’s name, an indicator whether this is the initial timestep of a new trajectory / on a new system, the dimension of the expected control inputs (which you can also infer from robot name and training data), the current state of the system, and the next target position. As response, the next control input is expected. The system is then simulated forward given the received control input, the next state is observed and your controller queried for the next control input, and so forth.
- At the end, all trajectories are compared to the target trajectories and your controller is evaluated (see below).
In the starter kit, wrapcontroller.py handles the socket communication
and effectively instantiates a new controller for each new system and target trajectory pair
(calling __init__ in controller.py with system name and control input dimension as arguments)
and then repeatedly calls get_input(state, position, target) to retrieve the next control input that
it then communicates back to our evaluation environment.
The response to the first query on any new system must be received within 16 seconds, that is, your controller must be initialized in less than 16 seconds on a new system and trajectory, and no single query-to-response time is allowed to exceed 0.08 seconds. The total time budget for controller computations only is limited to 32 seconds (16 times the “trajectory time”, which is 2 seconds) per target trajectory, that is, your controller must respond with the first controller input within 16 seconds, and with each of the 200 consesutive control inputs within 0.08 each so that the maximum controller time for one trajectory is $32 = 16+200\cdot .08$.
Basic Usage
Start based on the starter kit submission and change only train_controller.py and controller.py,
possibly loading pretrained models (which you stored and included in your submission.zip file)
in __init__
and computing the next control input in get_input.
For storing and loading models, you may use the onnx format,
or save numpy arrays or json files with model parameters derived locally on the training data
for use during the controller run.
Advanced Usage
If you need further python packages, the easiest solution may be to build your docker off of our basic starter kit docker image, adapting the metadata file accordingly, and keep on using the wrapcontroller.py file that handles the socket ipc.
It is also possible to use R, Julia, C, … by setting up a custom docker image that includes additional Julia, Python, R dependencies, and uses ZeroMQ bindings to implement the socket protocol in the target language directly. We provide Julia, Python, R example docker and submission files – build your own docker with all the software and packages you need.
Debugging
Under the participate tab, CodaLab offers the following log files and options for each of your submissions (most relevant ones are highlighted):
- Download your submission (this does what it says)
- View scoring output log
In addition to the overall loss, which is also shown on the CodaLab leaderboard, you find more detailed results per groups of systems listing theloss = deviation-scaled + control-scaledas well as the unscaled squared deviation loss and control cost. - View scoring error log
May be informative for failed submissions. If there is no further information here or in the ingestion error log, then likely your submission did not include a metadata and start.sh file so that evaluation and your controller could not be started. - View predict output log (should be empty)
- View predict error log (should be empty)
- Download output from prediction step
Contains metadata (exit codes and total time elapsed), scores.txt (the same as under “View output scoring log”), and a detailed_results.html file. During the validation phase, detailed_results.html shows gifs for some of the robot-trajectory combinations which illustrate the behaviour of the robots under your provided controller. - View ingestion output log
This log file contains detailed reportings of controller time spent on each target trajectory. This may be helpful to inspect for which systems your controller is too slow and gauge how close your submission is to exhausting the time limits described above. This file only contains output from your controller code in the “Debug Controller” phase and not in any of the other phases. Therefore, in order to debug your submission, you may submit it to the “Debug Controller” phase, which will launch and interact with your controller mimicking a real evaluation, while the system observations are fake (in order to avoid target trajectories being printed to log files); this is how you can use the “Debug Controller” phase and print statements in your controller code, to identify the source of any problems you may encounter to fix any failed submissions. - View ingestion error log
This file only contains stderr output from your controller code in the “Debug Controller” phase and not in any of the other phases. Therefore, in order to debug your submission, you may submit it to the “Debug Controller” phase, which will launch and interact with your controller mimicking a real evaluation, while the system observations are fake (so as to avoid target trajectories being printed to log files); this is how you can use the “Debug Controller” phase and the stderr output of your controller code, to identify the source of any problems you may encounter to fix any failed submissions. - Download output from scoring step
Similar to “Download output from prediction step”; any error in the metadata file can be ignored and does not relate to your controller code.
Evaluation
For each of the
24 systems, the controller will be evaluated using 20 different target trajectories. For each system, i, and target trajectory,
z_*^{i,k}, k = 0,...,9, the controller will be applied to the system to compute the trajectory using the submitted controller.
The following loss (smaller is better) is then computed for each system,
\(J_i:=\frac{1}{20}\sum_{k=1}^{20}\left(b_{i,k}\cdot \left(\sqrt{ \int_{0}^{2}||Z^{i,k}(t)-z^{i,k}_*(t)||^2_2 dt }\right)^{d_{i,k}} + c_{i,k}\cdot \sqrt{ \int_{0}^{2}U^{i,k}(t)^{\top}U^{i,k}(t) dt } \right).\)
The mean loss over 12 of the systems is used for the preliminary leaderboard during the validation phase (the mean over 1 trajectory and different but related systems is used for the trial phase leaderboard). The final leaderboard uses the mean of the losses over the remaining 12 systems.
Baselines
We offer three baselines: a zero baseline, a random baseline, a PID starting kit submission, and a baseline based on optimising the controls such that the predicted position change, based on a prediction algorithm derived on the training data, aligns with the target position change. For reference, the loss is scaled such that an oracle LQR-controller achieves a loss of 1, and the zero baseline achieves a loss of 100.
Zero baseline
This baseline simply sets the control input to zero at every time step, irrespective of state, position, and target trajectory.
Random baseline
This baseline sets the control input randomly at each time step, irrespective of state, position, and target trajectory.
Starting kit baseline
Baseline
For this baseline, each system’s training data is used to derive a prediction algorithm that predicts the change in position (from the current to the next time step) using the system’s current state and the applied control inputs at this time step. During control the next control input is decided by querying the system specific prediction algorithm with the current system’s state and a candidate control as input; the control input is then optimised to optimally align the predicted position change with the intended position change (from the current position to the provided target position).